Thursday, October 25, 2012

Construction Birthday Cake

I know its been a long time since my last post, but with the holidays right around the corner its the perfect time to jump back into things.  Before I get too excited about the holidays I want to share this birthday cake the I made for my son.  I was very nervous about making it, but it was so fun and really easy to do. 


I started by trimming the top of the cakes to make them flat on top.  Then I put a layer of frosting on the first layer and put the second layer on the frosting upside down.  This gave me a really flat surface to work on. 

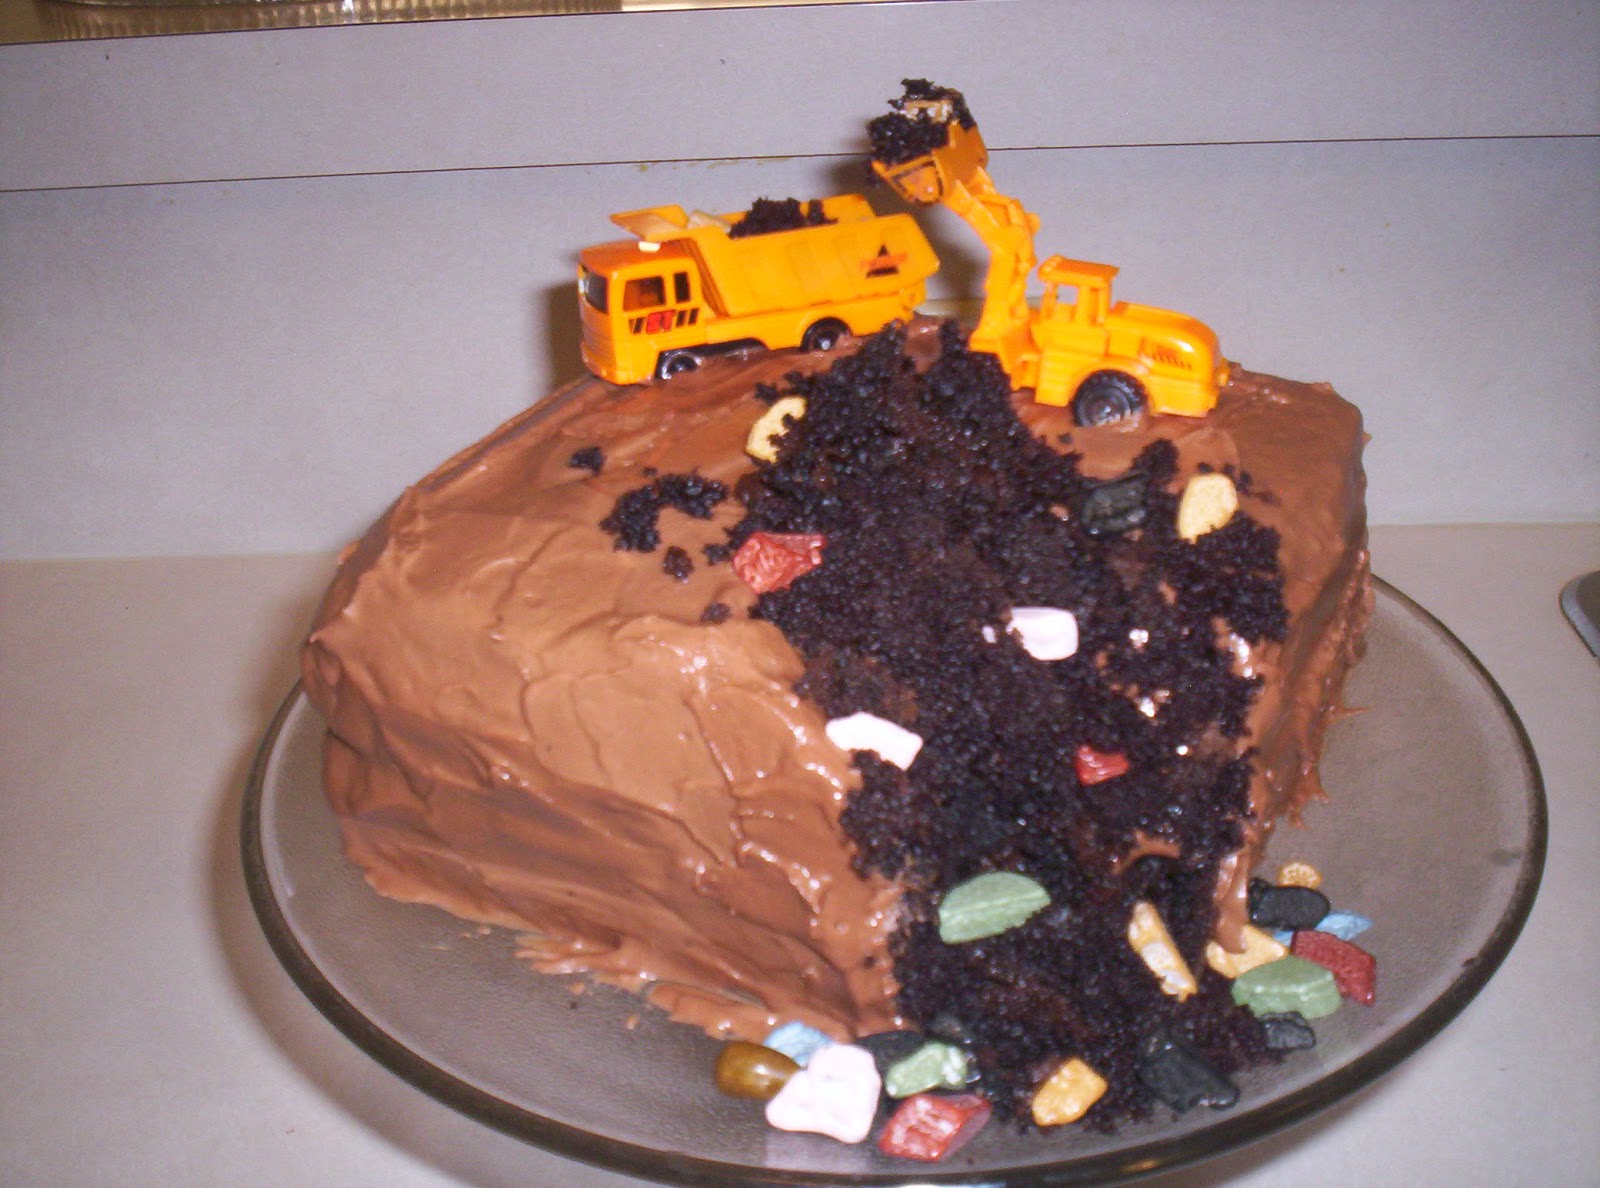
 Then I carefully scooped out a corner of the cake with a spoon and frosted the rest of the cake.  It doesn't have to be perfect and smooth because it is a supposed to be a construction cake. 

Then you get to decorate and be creative.  You could use crushed oreos here if you like, but I just wanted to use the cake because I like how it looked.  You will have the cake tops that you cut off plus the cake you scooped from the corner to use.  I also thought the choco rocks added some texture to the cake.  I think they were my favorite part of the cake to eat!!

I had a blast making this cake and was so pleased with how it turned out.  I have also made some delicious treats lately that I am excited to share with you soon!!


Wednesday, December 28, 2011

Hot Artichoke and Crab Dip

This recipe is perfect if you are looking for an appetizer for New Year's which is just around the corner.  It is my grandmother's recipe, and we have this every year when my family gets together during the holidays.  We didn't visit my family this year, but I still made it because its one of my favorites and feels like home to me. 

8 oz. crab meat
8 oz. cream cheese at room temperature
1 cup mayonaise
1/3 cup chopped onion
1 14 oz can artichoke hearts drained and chopped
3/4 cup shredded parmesan cheese

*I just use imitation crab meat because that's what my grandmother uses, but I'm sure you could use the lump crab meat also. 

Preheat oven to 375 degrees.  In a bowl, blend cream cheese and mayo together until smooth.  Stir in the remaining ingredients and place into glass pie plate.  I save a little cheese to sprinkle on top too. 
Bake uncovered 15-18 minutes, until heated through and lightly browned.  Let cool 15- 20 minutes before serving. 
Serve with crackers.  Ritz are my favorite with this or you could try any others you like. 

*I mixed mine the day before and then baked it right before I was serving it and that worked really well.  You will just need to bake it a little longer to heat it through. 

Saturday, December 24, 2011

Easy Pretzel Turtles

These are a super easy and yummy treat that I love year round, especially at Christmas time.  They don't take long to make and they pack well if you need something quick and easy to give to your neighbors.  

1 Bag of Rolos
Pretzels
Pecans

Optional- Red and green m&m's for Christmas

Pre-heat oven to 350 degrees.   Unwrap all the rolos.  Line baking sheet with foil.  Place pretzels in a single layer on foil and one rolo on top of each.
Bake in oven for 3-4 minutes until they get shiny and start melting.  Take them out of the oven and gently press your nuts onto the melted rolo. 

Allow to cool, and then they come off the foil easily.  And Enjoy!!

I added some m&m's for the kids, but the nuts are my favorite.  You can add your favorite nut or just leave them plain too. 

Tuesday, December 6, 2011

Cookie Monster

When my husband and I were newly married we used to eat pizza a lot.  And at one of our favorite pizza places we fell in love with one of their desserts called a Cookie Monster.  We would often just go there to get this dessert.  They place it in the middle of your table, everyone grabs a spoon and digs in.  Great for date nights with other couples or to share with the whole family!!
If you like the combination of hot chocolate chip cookies right out of the oven and vanilla ice cream just as its beginning to melt, then you are in luck.  Here is what you will need. 

Chocolate chip cookie dough
vanilla ice cream (softened a little)
can of whipped cream
caramel
hot fudge

I had some pre-made cookie dough and there was just under a pound of it.  It was perfect to press into my 8 pan about 1/4 inch thick.   Bake at 350 degrees for about 15 minutes until cookie is done. 
After it is done let it set for a few minutes, so its not piping hot when you spread the ice cream on it.  Don't wait too long because you do want it hot.  
You have to work fast once you put the ice cream on it so I didn't get a picture, but you want the next layer to be about a 1/4 to 1/2 inch thick of ice cream.  I prefer vanilla ice cream for this, but use your favorite if you want. 

Then quickly spray some dollops of whipped cream on it all over and drizzle with hot fudge and caramel.  Be sure to have the spoons and everyone else waiting for you because you will want to eat this immediately.  And be warned it WILL make a mess.  There will be a soupy mess of melted ice cream in the bottom as you eat, but it is definitely worth it. 

*If you have small pans you could do individual size ones if you want.  

Saturday, November 26, 2011

Layered Pumpkin Pie Toffee Cheesecake

I know the holidays aren't usually a time for trying new recipes, but I have to admit it was one of the best decisions I have made.  I love cheesecake and I eat pumpkin pie at Thanksgiving and Christmas just because its always available.  Put them together though and magical things happen, and the toffee just makes it extra yummy.  I got the recipe from one of my favorite food blogs found here but these are my photos.

If you are looking for a great recipe for Christmas try this or anytime before then too!!  As you can see its about 50/50 pumpkin pie and cheesecake, and don't forget the whipped cream and toffee bits for the top. 
Our Thanksgiving was so wonderful this year.  Our week was filled with fun, family, football and of course a lot of yummy FOOD!  We made it really easy by baking all day on Wednesday so we could enjoy a nice easy day on Thursday.  We made three pies, rolls and candy turkeys for our table decor the day before.
My life was also easier because my husband volunteered to deep fry our turkey again this year.  I love it because it is one less thing I have to cook, but it also leaves my oven free to cook and heat up the side dishes. 

I know the skin looks dark, but I promise the turkey isn't burnt.  The skin protects the meat on the turkey so well and keeps it nice and moist inside. 
I hope everyone had a wonderful Thanksgiving.  Feel free to share anything exciting from your holiday!!

Thursday, November 10, 2011

Snickers Salad

This is one of my favorite recipes that I got from one of my cooking classes in college.  I haven't ever had anything like it.  It's not a jello salad and its not a typical fruit salad. Its just different and I love it!!

It's great in the fall when apples are in season and great for the Christmas because you use red and green apples. 

2 granny smith apples
2 red apples (I used Fuji because I already had them)
1/2 cup whipping cream (whipped stiff with powdered sugar)
4 tsp powdered sugar
1 6oz container strawberry yogurt
2 king size snickers bars

First, whip cream with powdered sugar until it has stiff peaks.  Then gently fold in yogurt.  You want this ready so you can add your apples when they are cut up.  You don't want your apples getting brown while you are whipping your cream. 
Cut your apples and snickers into bite size pieces.  Then gently fold them into the whipped cream and yogurt mixture.  Serve immediately.  You can chill it before serving but not for more than a couple of hours.  You want your whipped cream to stay fluffy. 
Enjoy!!  If you make this let me know what you think!!

Monday, November 7, 2011

Wassail

I had never tasted wassail until I married my husband.  Until a couple of years ago it was just something you sing about in Christmas carols.  He on the other hand grew up drinking it every holiday season.  And for our family now it is always the first thing we do to kick off the holidays, make wassail and listen to holiday music.  My husband loves to make this so he gets all the credit for this recipe, and thanks for the pictures!!

Beware this makes A LOT so pull out your biggest stock pot for this.

1 gallon apple cider
1 lg can pineapple juice
2 -12 oz cans frozen orange juice
2 -12 oz cans frozen lemonade
2 quarts water
2 cups sugar (add more for sweetness)
3 cinnamon sticks
1 Tbs whole cloves

Bring to a boil and simmer for 15-20 minutes until the flavors come together.  Do not leave on high heat and walk away because it will boil over easily and then you have a huge sticky mess all over your stove. 
The water, sugar, cinnamon sticks and cloves can all be adapted to your liking.  The recipe I shared is the measurements that we used in this batch.  If you like it sweeter add more sugar.  If you get it too sweet add more water.  If you like it spicier add more cinnamon sticks and cloves. 

*Put the cloves in something like cheese cloth that you can fish out later.  You can poke them into an orange rind also and pull out later. 

This is great for large gatherings, or to sip on all through the holiday season or you can freeze it in jugs and reheat it as needed.